Monday, March 17, 2014

Shaving while travelling: Hotel disposable razor.

I've been using an old school safety razor for a few months and I absolutely love it for many reasons. Recently, I went on an overseas trip and had the opportunity to use the disposable that is provided by the hotel and thought it was a good chance to compare the safety razor to something I started shaving with many many years ago.

 The ubiquitous one-use razor provided by the hotel.

The razor provided by the hotel looked like this. It had 2 blades, the head and body was constructed completely with plastic and it doesn't pivot - a common trait with most disposable razors. I had the chance to use quite a few disposable razors from many hotels and they they vary widely in feel, ease and quality of shave. What is really important in a disposable razor is for the guest to obtain an acceptable shave. Forget about any other factors as they do not matter when that is the only razor you have access to.

The question is, is it okay to rely on the disposable razor provided by the hotel to get you out of a hairy situation?

The prep:

To keep the comparison fair, I took the same procedure as I would while using my safety razor. I first took a hot shower, followed by applying a the included Gatsby shaving cream sachet. I swirled the cream around my face with my hands for a while. No lather formed, but maybe it was supposed to be this way?


The shave:

First off, I started going with the grain. It felt like it wasn't shaving anything at all and the razor was skipping instead of gliding. The shaving cream was not providing enough lubrication and it gunked between the blades. It was not possible to remove all the gunk from there despite how much water I used. It did not remove much hair during this pass but I pushed on with across the grain.

Yep, the shaving cream gets deposited between the blades and there are no holes for the cream to run out. Suitable for 1 use only.

I was dreading going against the grain because I was afraid that the pressure would cut me especially when the razor was already skipping. Long strokes wasn't possible and I had to use very short strokes instead. Surprisingly, it went rather well. The shave as comparably close to my safety razor and I didn't have any nicks.

Thoughts:

I had a suspicion that the shaving cream included here just wasn't suitable for a multi-head razor. So, I tried it again using a much lighter Gilette limely shaving foam instead. This time, the experience was much better and the shave was as close as those I had with my safety razor. Surprisingly, I felt far less sting when putting on my aftershave splash. Truly, the cartridge razor design does require less skill and thought to shave than a traditional razor considering that I managed to achieve a similarly close shave to a traditional razor with less damage to my skin even though it was my 2nd time using the disposable razor after so long.

I so much wished that this could be an opportunity for me to praise the traditional safety razor but unfortunately, I could not. The modern razor design does bring about modern day benefits to an age old grooming necessity but it also takes away all the elegance that comes with it.

Conclusion:

So there you have it, it is acceptable to use the razor provided by the hotel (assuming that your hotel provides one in the first place). The razor is probably going to last you a few shaves depending on how concerned you are with hygiene.

The determining factor on how good your shave would be is likely to depend on the shaving cream provided. Perhaps you can try using the hotel shampoo as an alternative if the cream was terrible.

Friday, February 21, 2014

My encounter with a Double Edge / Safety Razor


I first bought my $4 Rimei safety razor on impulse as a novelty. It is a simple 3-piece razor that is quite nicely constructed. I was intrigued by the way people do things in the past. Typically, older things typically require the user to read instruction manuals and procedures to follow. Shaving with a safety razor was one such affair.

I was scared to use it at first because I had to handle the blade and put it into the handle. What if I cut myself? Will it give me many cuts on my face while I shave?

I followed the advice from forums and youtube videos and it really needs more care to shave compared to a cartridge razor. The biggest difference is the length of the blade exposed and the fact that the head does not pivot. This meant that holding the razor at the wrong angle result in cuts or a disappointingly ineffective shave.

See that sheet protruding from the top cover? That is how much the blade protrudes out.

In a nutshell, it worked great. It wasn't too difficult to shave despite being completely new to it and I didn't cut myself and managed to get a clean shave. Not particularly well done, but it was acceptable. My electric shaver could have done a better job in less time though. I respect the way technology has advanced to allow consumers to do carry on with their lives with so much ease, but there is something fun about taking the time to shave with an old school safety razor.


The two pieces form the head of the razor, with the foreground plate serving as a safety barrier from the blade. Hence, the naming of the razor.

Another point to note is that shaving with a safety razor can be very inexpensive. The design was very economical since the only thing that needs replacing is just a thin sheet of metal while the razor will last forever. Each blade costs in the range of S$0.40 to as low as $0.08. It typically gets cheaper when you buy a 100 blade pack instead of a 5 or 10 blade pack. I started out buying small packs, while it is more expensive, it allows me to try out different brands to see what works the best for me. Also, while most people, presumably westerners, managed to get 4-8 shaves off each blade on average, I find that my blade lasts longer than that, probably because my stubble is not that coarse.


According to online reviews, this sampler blade included with razor is rather high quality. The stains are due to a couple times of use.


As I read further, I got to read that shaving with a safety razor was actually be done as an indulgence though painstakingly slow, but sophisticated procedures. I think the technology of the yesteryear is interesting in the sense because they required some skill and knowledge to bring out the best in their tools. Whereas now, consumerism has focused on making products that are convenient and simple to use.

With that said, that is not to say that modern day technology had made shaving worse, in fact, I feel that even inexpensive electric shavers such as the one I reviewed earlier largely reduced the chore of shaving and gives a close, smooth shave without fail.

I urge you to try it out for the fun of it. Traditional shaving has its charms and I've been trying to improve my technique in hope that it can one day be as good as shaving with my electric shaver.

Tuesday, February 18, 2014

Gillette Foamy Lemon Lime shaving foam

Ok, Here is my little review of the shaving foam I'm using for my shaving with a safety razor.

After reading forums and blogs about shaving, it seemed unanimous that anything that comes out of a can is terrible. Most shaving enthusiasts, if there is such a thing, will recommend creams and shaving soaps that would require him to spend some time to whip up the rich lather you see on shaving commercials. According to most writings on the net, that is the only way to get nourishing, rich lather that enriches your shaving process. But is that the case?

I started off from shaving foams because that was one of the first things I saw in Watsons when I first started shaving. The price is reasonable. A can for less than $10 that lasts about half a year.

One of them I tried was this:
 The Gillette Foamy Lemon Lime Shaving Foam! It is the 175g can.


Simple Honest Classic were the 3 words Gillette described this foam.

I've used almost half the can before I neglected it for a year after getting my first electric shaver, the Braun MobileShave M-90. Only recently, did I picked it back up.

After picking up shaving with a safety razor, I also got myself a Schick Hydro Shaving Gel and an old skool Tabac Shaving Soap (an inexpensive soap that received high praise from the net). So, I'm going to compare my experience of this foamy stuff against them.

Convenience
In terms of convenience, nothing can be easier than using products from an aerosol can. Simply shake and use. Its advantage comes in the speed and ease of use compared to shaving soaps. I can see its use in travel situations, although you might want to get the smaller can to fit into your travel toiletries kit.

Smells and Notes
Well, it has the artificial Lemon Lime smell. It is a faint smell that is only confined to the foam. It goes away the moment you rinse your face. This is good when you use an artisan aftershave product and do not want a strange mix of smells on your face. The smell is easily tolerable if you don't like the smell of lemon, heck, there are other flavours if you want.

Quality
Well, it is foamy and smooth when it is wet and it certainly does the job of letting the blade glide over without much sensation. However, like the shaving gel, it does dry out quite quickly, requiring a constant re-wetting of the area before continuing shaving.

In summary, it is a really simple foam, nothing more. I probably won't buy it again now that I discovered shaving soaps and creams. The convenience is not exactly an advantage for me as I shave at night and there so many soaps and creams that provides a much higher quality feel at the same inexpensive pricing.

Shaving soaps and creams may be a little more tedious, requiring a shaving brush, high quality soaps and creams are rather inexpensive and very value for money because they last very long while offering lovely long lasting smells and nourishes the skin. My skin feels super every time I use the Tabac shaving soap. In fact, it feels so good that I may use it as my face wash!


Just so you know how I apply my shaving foam, here are the steps I follow:

Procedures for shaving foam

1) Shake well before using
Well, firstly, before you even squeeze the nozzle, you'll have to shake it quite a bit to ensure that the foam comes out nice and bubbly. It took me about 30seconds of shaaaking each time in order to get a decent foam.

2) Wet your face
Wetting your face is important because the foam dries out very quickly, leaving your face sticky and the razor will not be able to glide over your skin at all. I use warm water to help open up the pores and soften the hairs for an easier shave later on.

3) Spray it directly on your face or on your hand
My can is slightly old and doesn't give a rich expanded foam no matter how vigorously I shook the can. In order to spread it evenly on my face, I usually spray it directly on my face and massage it all over my bristles.

4) Start shaving
At this point, there should be no problems having a close shave with a cartridge or a safety razor.

5) Re-wet the skin
After shaving one side, the other side is bound to get dry after a while, leaving your skin unsuitable for shaving unless you re-apply water - just wet your hand and swirl around your face again will do the trick and that's all to it.

Sunday, February 16, 2014

An average guy talks about his history of shaving

For the longest of time, I thought that the only 2 tools available in the market to get rid of facial hair - electric shavers and multi-blade cartridge razors. It is a ritual that most guys to keep them from looking unkempt, so shaving tools are a must. Let me walk you through my shaving journey that made me think that way.


My JC days
I first started off using disposable razors during my Junior College days because they were affordable and easy enough to use. Those razors had 2 or 3 blades in them and I only needed to use it every once a week or so. I re-used them many times until they become a little too blunt for comfort (when going past an area many times to achieve the same "closeness" in shave". I rarely used any shaving foam or gel as I only had to remove only a little facial hair.


My National Service days
Then I was introduced to the premium multi-blade razors during my army days when I was given a Gillette Mach 3 Turbo for free as part of the equipment army required me to have. It felt really good during the first few times I used the blade. They were really sharp and more comfortable than the disposable ones I relied on in the past. They were very smooth over my skin and was really close in shave. However, after a few weeks of using it, the blade quickly became dull and there was some tugging and pulling.

I bought new cartridges and a can of Gillette shaving foam. I only used it during the weekends because it was troublesome to use it in camp. Besides, I only had to use it on Wednesdays. Without the shaving foam, the razor was a little less effective in still gives shaves enough to pass parade inspections. But there was one problem, every replacement cartridge was kind of expensive. About $20 for 4 cartridges and each one starts deteriorating after a month or so. While they were better than disposables, the price premium was too high to justify the product.


My Post-University / Working days
When I graduated a year ago, I had the impression that the way it worked wasn't effective. I wanted to try an alternative to a razor because of the price premium. Hopefully, I will be able to get more cost effectiveness from this category.

So I read reviews about them online and it turns out there were many video reviews and tests by curious people all over the world. I learnt that the vibrating comb of electric shavers actually work like a pair of scissors, which was supposedly effective in snipping off those little hairs. Different shavers have different features and some even have a self cleaning dock that uses proprietary cleaning solution to rinse the shaving head. These features typically makes if faster and more convenience of shaving for the fast paced men of modern society.

Unfortunately, electric shavers were also on the expensive side, starting from $50 for a basic AA battery operated shaver to several hundreds of dollars depending on the amount of bells and whistles it has. Although the upfront cost of shavers can be high, it is likely to last long enough to cost you less in the long term compared to those multi-blade razors.

Feeling experimental, I bought the $50 Braun MobileShave M-90 and have been using it for more than a year now.


Recently
A week ago, I discovered safety razors. I knew I saw them in old movies before, but I never thought that I would see people selling them at a pasar malam I visited. Hey, it was a cheap China-made $4 item and shiny. Who could resist that? Even if it was rubbish, it would still work well as a decorative item, right?

Shall talk about it after trying it out!

Sunday, February 09, 2014

My workhorse: Braun MobileShave M-90


I have been using this electric shaver for more than a year now. I use it once every 3 days, mostly in the morning as I get ready for work. It provides quick, convenient and comfortable shaves of reasonable closeness. If I take time to swirl it around my skin longer, it is possible to obtain the highly regarded Baby Butt Smooth (BBS), a term often used by razor enthusiasts.

Wet shaving enthusiasts often claim that electric shavers are inferior compared to traditional razors as the hair seem to grow back faster. Well, this is because of the different concepts used to remove hair. A razor is simply a knife edge that not only slices hair, but also removes a thin layer of skin around it, which causes skin irritation and soreness to a certain degree, but also means that the hair is cut down to a shorter length and as the hair grows, the skin around also grows back, resulting in a more lasting shave.

An electric shaver, on the other hand, is like a pair of scissors. As the hair is guided through the perforated foil, the vibrating comb under it slices the hair against the edge of the foil, creating a cutting action. This, typically hurts the skin lesser than a razor, making it more comfortable.

To me, the different shaving methods are just different strokes for different folks.

In summary, if you are looking for an electric shaver and your facial hair is of average coarseness, the Braun M-90 is a good choice.

What is an M-90?
The Braun M-90 is an entry level shaver from Braun. Several reviews mentioned that it works great for thin and averagely coarse hair, but does badly for really coarse or long hair. To deal with longer hair, the M-90 comes with a hair trimmer that makes short work of long hair that cannot be sufficiently guided through the foil. Using the hair trimmer followed by the shaver fulfills my shaving needs.

It features a turning cover that acts a shield to protect the foil when not in use and a lock-out to prevent you from accidentally turning it on while it is in your toiletries bag.

Oh look, a hidden trimmer that sticks out. Don't worry, the trimmer only works when it is in this position.

Being a cheap shaver, it runs on replaceable 2x AA batteries that are easy to find. Other expensive shavers typically make use of a non-replaceable lithium-ion cell, sealing the lifespan of the shaver to approximately 3 years. Rechargeable batteries are still consumables and I do not like the fact that the whole shaver would need to be replaced once the batteries are worn.

 Twist to open the battery compartment. The construction feels quite sturdy and can keeps out any unwanted splashes from entering the battery compartment.

The M-90 provides adequate shaves in less than 3 minutes. Sideburns are eliminated within a few motions and it mows through the difficult chin area with minimal fuss. If it doesn't remove hair after a few passes, changing the direction usually does the trick. However, do note that it does cause some irritation after prolonged repeated passes over the same area, especially the chin and neck.

Close up of the small but effective hair trimmer.

Price
I bought it at $45 at from the Best Denki at Junction 8. Most other electric shavers come in at above $100 and quite a significant initial investment for anyone starting out with an electric shaver. The impression I get from reading reviews about this little tool is that it is inexpensive enough for a newbie who has thin to averagely coarse facial hair and provides most of the quality and features expected of a decent shaver. In short, provides quite some value for its price, which is why I got it.
Close up of the foil pattern.

The Use
Being a dry shaver, it requires little preparation. In fact, I think it works better on a slightly oily face after a night's rest. The oil acts as a lubricant to allow the foil to glide over the skin while protecting the metal comb from rusting. The manual actually states that a little light oil should be applied onto the comb if the shaver was to be kept in storage for a long time.

The Maintenance
Even with such convenient product, it still requires some periodic maintenance. Thankfully, there isn't much the M-90 requires you to do.

Cleverly concealed slot to keep you from losing the brush. Great thinking there.

1) Open up the cover holding the foil and brush away bits of hair stuck along its comb. If you haven't been cleaning if often enough, a strong spray of water at the comb will remove just about all the hair bits there. Don't worry, it is waterproof at the business end.

Unfortunately, the foil and comb head are not replaceable parts. The good news is that they last long.

2) Rub away all the oil and skin residue from the cutting foil and let the individual parts dry out before putting them back together.

Oh yes, a pair of AA batteries last many months so I didn't bother performing a power consumption test on it. I would recommend that you use rechargeable batteries as you can charge them up to full capacity every few months or so to keep the shaver in tip top condition shaving condition.

Recommendation?
Yeah, why not? It is a no frills electric shaver that promises a no fuss shave, everyday.

Monday, February 03, 2014

An average dude talks about shaving.

Just a little introduction about me before you continue reading about my shaving posts. I am a Chinese with relatively sparse and uneven facial hair growth and because of that, I need to shave every 3 days as I would start to get some stubble by then. And no, having uneven facial hair does not add anything to my manliness.

As there are many different facial hair types, do take note that my write ups and reviews would be slanted towards my thin facial hair type and may not always apply to you even if you are the same race as me. The thickness of my facial hair meant that almost all kinds of shaving equipment would work sufficiently to get the job done. So, even the cheapest of shaving equipment would be good enough for me - so far, I've tried disposable multiple blade razors (even those where the entire handles are disposable) and cheap electric shavers and these were able to give me a shave close enough to return me to revert my face to its baby smooth state.

In Singapore, typical brand name electric shavers can cost a few hundreds (my friend who has thicker and faster beard growth bought a $400+ Braun to suit his needs) and disposable razor cartridges can add up to quite a lot in the long run.

In the beginning, I didn't thought much about shaving since it was a chore that I simply had to deal with and wanted to get it over and done as quickly and painless as possible. I have been using a sub $50 electric shaver for more than a year now and it works fine for me. It was fast, painless and low maintenance. A review for this will be coming soon.
It was until I encountered safety razors on sale at a pasar malam (temporary night market). I was curious that these things are still available in Singapore. The last time I saw one was when my late grandfather was still around. I vaguely remember seeing some Gilette dual edge blades in the toilet when I was a kid. The razor was on sale for $4 and a pack of 5 blades were going for 90 cents. It was cheap enough to be an impulse purchase and if it didn't work out, there is no heartache throwing it out.

And that's when became intrigued by the old shaving methods with a safety razor...

Look out for some reviews in the horizon!

Happy Lunar New Year to all!

Monday, January 27, 2014

Renewing your Iphone home button

My trusty Iphone had been around with me for around 2 years now. It is something that I carry with me so often that it has come to a point where it feels as though something is missing if I do not have it with me in my pocket.

As you would imagine, an iphone of a 2 year vintage is one that is not in the best of shape. No longer are electronics made to last many years and expected to continue working after a simple repair from your neighbourhood electronics repair shop. This isn't the 1990s.

It seemed inevitable that my iphone's home button became so unresponsive that I have to squeeze the hell out of it just to get it to register a click. It truly annoyed me that Apple had decided to make the button so susceptible to this problem. The simplest solution to this problem, would be to toss my phone and get a new one by renewing another 2-year contract with my telco.

I like my phone and I do not wish to change it yet. So, I consulted google on the possible solutions to repair the home button. There were many ways, some as bazaar as twisting the phone clockwise while pressing hard on the home button. Despite my penchant for logical methods, I tried most of those suggestions anyway. I was desperate.

After some searching, I cam across a suggestion involving pouring rubbing alcohol on the home button and repeatedly pressing it in hope that doing so will dislodge the gunk stuck inside and get dissolved in the solution and slowly drain out of the seams of the circle button.

Honestly, that sounded like a sure way to fuck up delicate piece of technology. Since when did liquids and tech mixed well together? Nevertheless, I read on and amazingly, there were several comments about how well it worked. It sounded like I've finally stumbled upon a miracle cure for my dying iphone. Like the legendary Eu Yan Sang 1000year old ginseng that is rumored to be able to prolong a dying man's life.

I spotted a bottle of rubbing alcohol at Watsons and decided to give it a try anyway. I switched off my iphone for the extra touch precaution to minimize the risk of shorting and poured a few drops of the miracle solution onto my button, let it soak for a few seconds and repeated pressed the button until all the liquid had oozed out. Then, I wiped it a little more for good measure and turned the sucker back on.

Lo and behold, it actually works! Now it takes only a light click to activate a button. It was as good as new again! I told my family about this and it turns out that they too had been suffering from the pain of a bad home button and eagerly hope that I can repeat the same success I had with my phone. And it did! all their home buttons now works well again!

If you have given up hope on your iphone and don't mind spoiling it in the process, this is one method you really should try.

Saturday, January 11, 2014

Fixing your unresponsive buttons (on a Philips cordless phone CD240 Duo)

Hi everyone! It's been a while since I last wrote something. Been very drowning with work and didn't have the time to write more stuff.

Ok. I have been living with an old cordless phone works completely fine except for button number 9, which one of the most used number because most mobile numbers in Singapore starts with 9. That button, after suffering so many presses, now needs an extraordinary amount of strength to activate it. This is a slippery slope because pressing it too hard may damage the circuit board under it.

I've watched several youtube videos and found that typically, buttons work the same way. So, no problem there since the method to repair them should be rather standard. The challenge comes in opening the device as they might be made in a way that opening it means destroying it.


Fortunately, my cordless phone is rather old and I really hope that design philosophy hasn't changed yet.

The bare minimum you need to begin:
1) Some small screws
2) Tissue paper
3) Water or cleaning alcohol
4) A week's worth of uncut fingernails (to help pry out the latches)

I won't be explaining the process of cleaning it since there are so many instructions available online. What I'll do is to describe how to open the Philips Cordless CD240 Duo phone.

Step 1: Remove the 2 main screws inside the battery compartment. (Of course, remove the batteries first)


Step 2: Pry open the top cover in that sequence. The latches are indicated by the red ovals. Do it gently and open each set of latches one at a time.


Step 3: Unscrew the 4 perimeter screws securing the circuit board. Be careful not the break any of the wires attached to different parts of the cover.


From here on, you'll be able to access the buttons and do your stuff! Happy cleaning!

Wednesday, November 27, 2013

Re-calibrating your iphone's battery meter

My iphone 4 is about 2 years old now and this is the time when battery life is starting to be a bit of an issue for me. Recently, it became necessary for me to use my portable charger on my phone every single day. Now, this is disappointing for me because, as someone really cares about batteries, I do expect a Lithium Polymer pack to last 3 years.

What's wrong with my phone?
I tried my best to make sure that I do not overly drain my battery too much before charging to reduce stress on it. After a while, I realised that my battery meter seems to decrease really fast from 100% but lasts disproportionately longer from 20% and below. This was a sign that the battery meter might be out-of-sync with the battery. Let me explain.

Typically, battery meters on digital devices such as laptops and phones are only estimates. Other than the determinable points such as the "full charged voltage" (100%) and "critically low voltage" (point where phone shuts off), it is very difficult to determine how much charge a lithium-ion/polymer battery has left between those two determinable points. Why? Lithium based batteries often hold their voltage very well until depletion and thus, making it very difficult to obtain a good estimate of the charge level by taking reference from the battery voltage.


As such, battery meters measure the amount of charge going into and out of the battery during charging and usage to estimate the remaining charge in the battery. Over time, the meter can get out of calibration due to random error due to things like difference in temperature, increase in battery resistance due to aging, battery self-discharge, etc.

Honestly, I forgot about battery calibration until I accidentally drained my phone battery till it shut off as I did not have access to a wall socket for 2 full days.

I was on the bus and minutes away from the safe refugee of my charger before the my phone decided that it was enough and shut off on its own at 2%.

How to recalibrate your battery meter:
I took the chance to recalibrate the meter by simply leaving it to charge for about 2.5 hours without unplugging it or using it. I purposely left it plugged in longer than I know it takes to obtain a full charge because I had to ensure that the battery had really reached its "full voltage". Remember, your battery meter may not be accurate even though it shows a 100%. However, the charging electronics will be able to tell if it has reached full charge and terminate charging.

After that, my phone was able to last 1 full day without charging compared to half day. Not bad considering that the battery had spent 2/3 of its expected lifespan.

Afterthoughts:
IT equipment has become so advanced to the point where everything is so convenient to the user. Gone were the days when instruction manuals were thick and explained the workings of certain user-maintainable components. Manufacturers expect their products to work perfectly for the user without the hassle of having him/her learn how to use it, which is why everything is so simplified and obscure to the user.

You may have encountered cameras with simplistic bar battery meters which deplete very quickly after losing the 1st bar. This type of battery meter attempts to use battery voltage as a reference, but is pretty much useless because it is rather drastic. Below is an approximation of the battery charge compared to typical battery indicator icons.

Well, I hope this article helps you understand a little better about your battery life and battery meters. Hopefully, this will minimize your encounter with the dreaded low-battery warning. Cheers!

Saturday, August 17, 2013

Taking public transport in Singapore as a tourist (and going to Night Safari/Zoo)

I noticed a lot of international visitors at my blog. If you happen to visit my country, Singapore, and plan to head to the Night Safari (just the zoo, but at night), I'll have you know that the easiest way to get there is...

1) Go to Ang Mo Kio Bus Interchange. It is connected to Ang Mo Kio MRT (train station).

2) Take bus service no. 138. It is at the last boarding berth so you'll have to walk the entire length of the Bus Interchange.

3) To pay for the ticket, you either get yourself an Ez-Link card (a contactless stored value card) from a TransitLink counter at either an MRT or Bus Interchange or you can pay in coins when you board the bus.

-When paying in coins, you have to tell the driver your destination and he will tell you how much it costs.

-When using Ez-link card, tap your card when you board and tap again when you exit. The fare deducted will be the based on the distance you travel.

4) When in the bus, you will start to find that the surroundings are a little less built up compared to town areas. At a certain stretch, the bus will drive through a rather quiet road surrounded by trees. At this time you'll probably start asking other passengers where the Zoo is. Honestly, it is difficult to tell you the number of stops to go as we don't keep track ourselves. Don't worry, the Zoo is the bus' last stop before it loops back to Ang Mo Kio Bus Interchange. The driver will chase you out of the bus even if you don't alight.

5) Enjoy yourself!

6) As 138 is a loop service, the bus stop you alighted at is the same bus stop to board at to go back to Ang Mo Kio Bus Interchange.

I wrote this because I get asked many times on my way home and I see many visitors becoming worried once the landscape turns darker and quieter as the bus makes its way to the Zoo

Hint, there are several 24hour eateries along the 138 route and if you are feeling hungry after your visit to the zoo, just alight anywhere along the row of shophouses.

Saturday, July 27, 2013

Fluorescent vs LED: Is it worth the switch?

When you head to the shops to get new bulbs, you get confronted by energy savings claims for choosing particular bulbs over "traditional" incandescent ones. While it is true that fluorescent and LED bulbs are both several times more efficient than incandescent ones, chances are, you are unlikely to be using incandescent bulbs in your house.

Most people are already using fluorescent lamps, be it the tubular kind or the compact swirl type (Compact Fluorescent Lamp). These offer a big jump in energy efficiency when compared to incandescent lamps. The price too, is a big jump. In the recent years, LED, a newer option appeared in the market as the prices became within the reach of the average consumer. These are often touted as lifetime bulbs as their lifespan is so long that most products that use LEDs are not designed for bulb replacement.

While it is true that each type of lamp have different colours, advantages, lifespan and brightness, it is important to consider how much benefit they offer against the other types.

Colour

Incandescent: In terms of colour spectrum production, Incandescent offer the best colour rendition because it provides a smooth spectrum of colours, just like our sun. This is why they are often used for photography, mood lighting and shop displays.

Fluorescent and LEDs: These are often criticized for their "coldness" and "harshness" of the light quality. Colours of things do not look "right" under these lights because they produce discrete colours instead of a smooth spectrum. This is due to the way they produce light from the excitation and relaxation of electrons. There are Fluorescent and LEDs that offer better rendition, however, those will cost more.

Lifespan

Incandescent: The worst of the worst. The fragile filament is rated in the range of 1000hours. (~7 months of use)

Fluorescent: Fragile design, but still lasts 10,000 hours (~5.5years of use) depending on the model, which is awesome. They become dimmer as they approach their end-of-life. The lifespan is also dependent on how often they are switched on and off.

LEDs: Hardy design. No breakable parts. 20,000hours (~11 years of use)

Brightness/Efficiency/Price

For the same application and similar brightness level, the power needed for each bulb are -

Incandescent: ~70W / $3 (Halogen E27)
Fluorescent: ~20W (CFL $12.90)
LED: ~8W ($14.90)

Prices from IKEA.SG

Notable things
Numbers are not all that matters

Dimming capability: Incandescent bulbs are completely capable of dimming while Fluorescent and LEDs are not always dimmable and they tend to be more expensive if they are capable of dimming. Incandescent bulbs are extremely versatile for this aspect because of their simplicity. Producing light by heating something up is simple!

Components: Most incandescent bulbs can be plugged in directly to the mains without requiring any other circuitry. Fluorescent bulbs need a ballast and a starter, while household LED bulbs have a step-down and regulation circuitry. These can also fail in time to come.

Cost Benefit Analysis
While it is clear enough while incandescent bulbs are really cheap to buy, they cost a lot more to operate in the long run. Hence, I will not be comparing incandescent bulbs.

Do LEDs really better value for money in the long run? To answer this, lets do a life-cycle cost analysis!
Take 20,000hours of operation (If switched on for 5h per day, this works out to be ~11 years of usage)

Fluorescent:
2 bulbs needed = 2 x $12.90 = $25.80
Energy consumed = 20W x 20,000h x 25.95c/KWh (Singapore electricity tariff) = $103.80
Total cost after 20,000h = $129.60

LED:
1 bulb needed = $14.90
Energy consumed = 8W x 20,000h x 25.95c/KWh = $41.52
Total cost after 20,000h = $56.42

Savings over Fluorescent = $73 (a 64% savings)

Conclusion

Initially, I was skeptical that LED are any better than fluorescent in terms of cost effectiveness. After doing a simple life-cycle cost analysis, it turns out that using LED will cost less than half the cost of using fluorescent in the long run. Sure, there are many different manufacturers and the price differs wildly. High end bulbs costs a lot more than the bulbs used here for comparison and they offer a lot higher efficiency while producing high brightness. If they are optimally placed, they may be able to replace 2 less-efficient fluorescent bulbs, thus reducing the number of bulbs needed in a home.

Sunday, June 23, 2013

Bought another torchlight - the Nite Ize Buglit

While the haze was about, I took shelter in a shopping centre while waiting for my friend and I chanced upon some lights in Home-Fix. Frankly, I get the feeling that DIY products sold in an air-conditioned are often marked up in price and the only reason I was in the shop was only to window shop. It is particularly enjoyable to look and feel products from air-conditioned shops but they ain't the best place to buy stuff from since they probably charge you for the air-conditioner in their products.

Brand Intro
It was then I chanced upon a little keychain light from Nite Ize. It a US brand that seems to have a few basic products and a lot of other products that revolve around it. One of their basic product is the Inova Microlight, which is a simple 5mm keychain light. The same keychain light is then incorporated with several other add-on products that add value to the light that they have. By doing so, it makes it easier for mass production because their basic product is essentially the same for their entire product range.

 Its a bug!


Size comparison
Left: Photon microlight, Middle: Nite Ize microlight by itself and the bug legs. (If you don't fancy the bug legs, you can also get the microlight by itself)

The mini-clip and flexible legs are also sold on its own if you wish to purchase more.

The Buglit Microlight
This is the little light that caught my eye. It is a perfect replacement for my decade old Photon microlight which was mysteriously damaged when I put my keychain bunch into my bicycle saddle bag. I was really disappointed because it is very well thought out and in my opinion, the best keychain light.


What I look out for in a keychain light
1. Firstly, it has to be extremely convenient to carry around. Being a torch light enthusiast, you can have many expensive and advanced torch lights lying around at home. But, normally, no one carries their torchlights around most of the time. As the old adage goes "the best camera you have is the one that is with you when the need arises" and it is the same for torchlights.


2. Made of durable plastic. Why plastic? When something is hung on the same keyring as keys, they are bound to be scratched by keys. Some metal keychain lights have to go to great extent to be anadoized, galvanized, etc. just to be hardy enough to be used alongside keys. What's the point of that when plastic is hardy enough and soft enough to withstand hard objects?

3. I hate it when keychain lights needs to be continuously pressed in order to keep it on. That effectively means that you'll have to reserve one hand just for the torch. I need one that switches on after 1 click.

4. Auto-off feature: keychain lights are bound to be turned on accidentally one time or another. Having an auto-off feature saves the battery from running down and saves you from the nasty surprise of having a dead battery when you need a light the most. (Most keychain lights do not have this feature. The Photon microlight has this and it is why I regard it as the best keychain light).

5. Run on reliable and common lithium coin cell batteries. Lithium coin cells are meant to be reliable for 10 years and more, unlike alkaline coin cells that have lower capacity and will drain away in less than 5 years. (Most scientific calculators use the old LR44 alkaline coin batteries.)

Why I bought the buglit
Although the buglit doesn't have an auto-off feature (I haven't test it yet. Nothing was said about this on in the product description), what the buglit offers in return is the weird flexible legs that serves the dual purpose of protecting the switch from accidental activations

EDIT: After leaving it on for more than 10mins, it did not shut off and I can safely say that it does not have any auto-off feature.


The button is in the middle for both microlights. The Photon on the right has 2 buttons: 1 for contant on (to scroll through different modes) and the other for momentary on, which is rather clever.

Strobe mode for extra visibility. Can possibly double up as a front blinker for bicycles in a pinch. =)

 The run time and output intensity doesn't seem to be proportional. HIGH is 6x brighter than the LOW, but the runtime is only about half of LOW. This is because of the way ANSI standard calculates runtime. This light is probably not regulated, which means the light output drops as the batteries drain. The mircolight will spend most of the 10hours near or below 1 Lumen in HIGH mode (I.e. 6 lumens to 0.6 lumens) .

"The continuous time lapsed from the initial light output to when the light output is at 10% of the initial light output." -ANSI definition

Practically, this lamp will operate at 6 lumens at the beginning of the battery life and slowly dim down till 0.6 lumen for the first 10hours. But this is okay as this is enough for indoor use, close-up work and getting you to your big ass torch lights. I prefer keychain lights to be non-regulated because this means they can run for a lot longer than regulated lights. In an emergency, its better to have a dim light than no light at all.

 It uses 2x 2016 lithium coin batteries, which is incidentally the size of 1x 2032 battery.

 You can use 1x 2032 battery instead of 2x 2016 batteries in this. The brightness will be reduced but the run time will be doubled. I like this "coincidental" feature because I bought lots of 2032 batteries from dealextreme a few years ago. I have several lights that uses 2032 and I hope to standardize the batteries.


The flexible "bug legs" offer a creative way to go hands-free. This greatly ups the versatility of the light. In fact, all lights should have this feature!

In all, if this light is available in your area, do get one! Everyone should have a reliable keychain light to prepare for the occasional. It is reasonably priced too.

Sunday, June 16, 2013

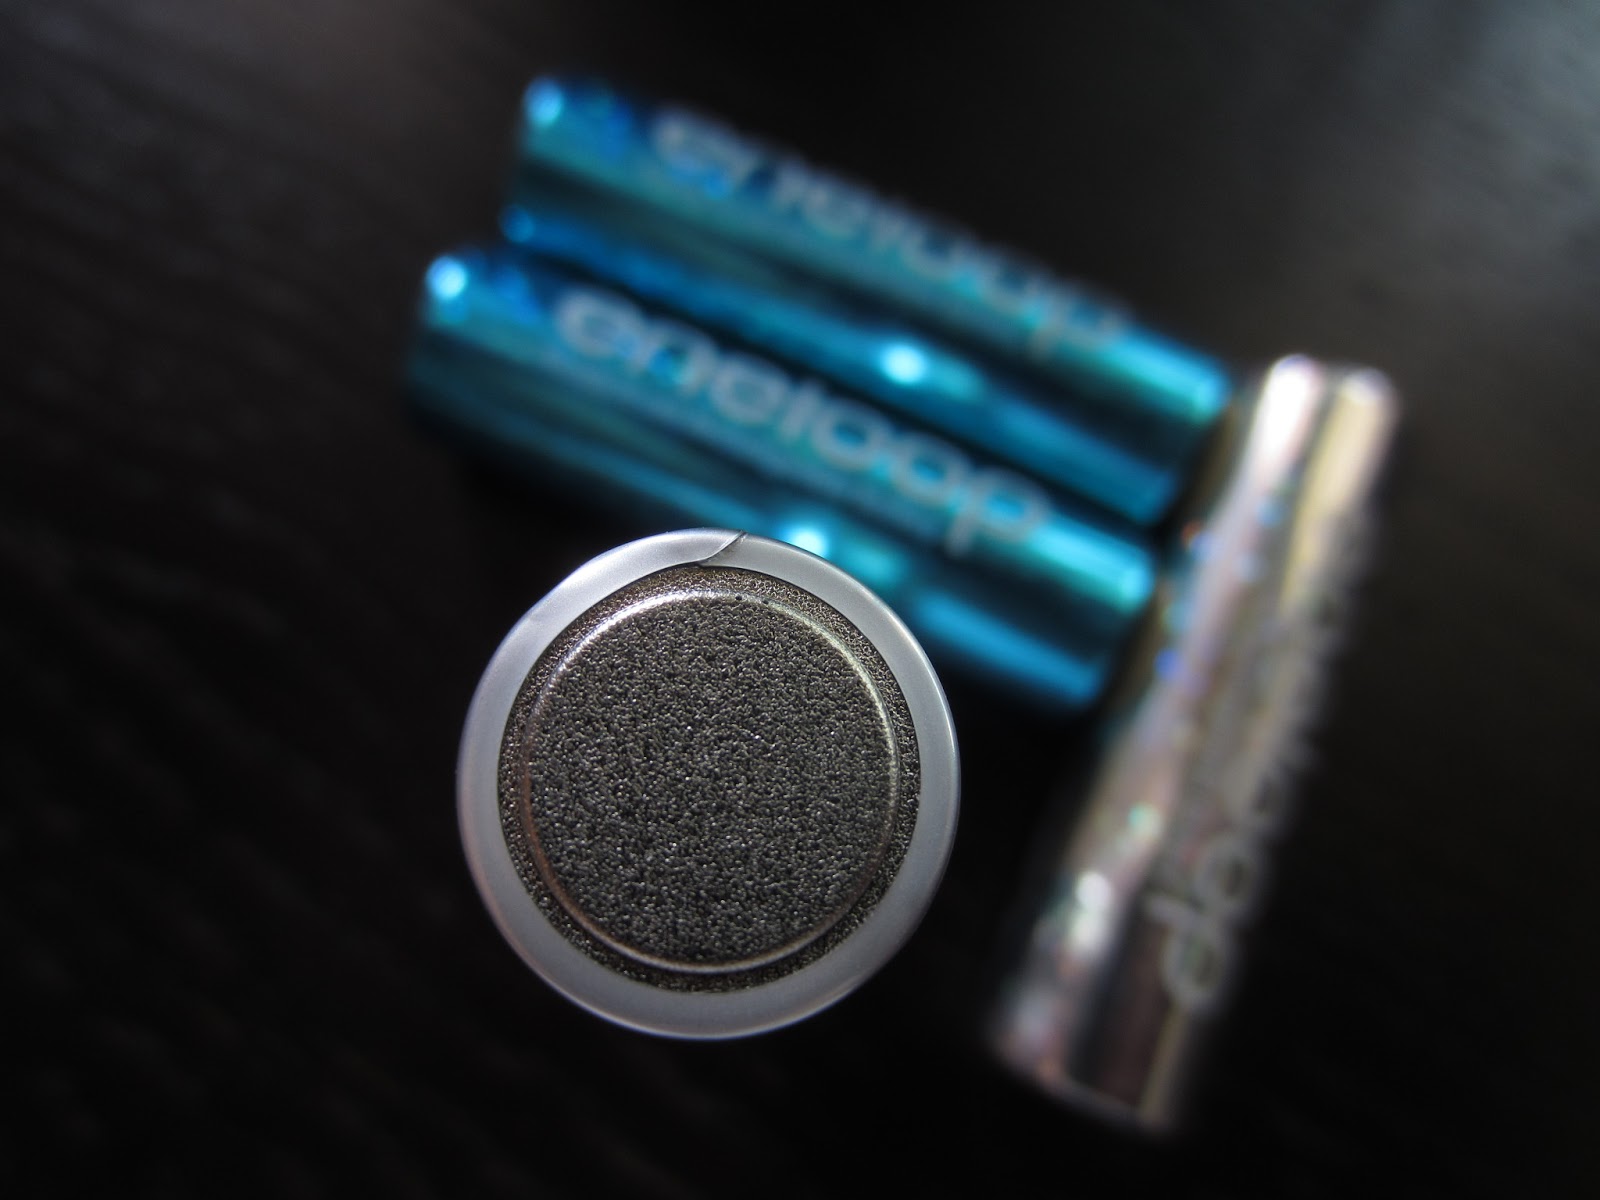
Eneloop glitters!


Got these 4 AA eneloop glitters for my birthday present. These little things have been regarded by most forumers at Candlepowerforums as the best rechargable NiMH batteries in the market and it is hard not to see why.

Self Discharge

These little things have impressively low self discharge. Self discharge was a problem with rechargeable batteries in its early days because it gave rechargeable batteries a bad reputation of being dead every time you need it. Couple that with the slow overnight chargers of the yesteryear, users of rechargeable batteries needed to be extra thoughtful when planning to use their batteries for whatever purpose. Most batteries would be flat by the end of 2-3 weeks and needed to be charged again. Then came the infamous high capacity Sanyo 2500mAh I bought about a decade ago which had the ability to lose almost all its charge in less than half a week. That was a turning point in battery history where people started to doubt the usefulness of trading self-discharge for higher capacity. After that, Sanyo started making eneloops, the first low self discharge batteries with albeit lower capacity of 2000mAh.

The low self discharge feature, for the first time, made consumer rechargeable batteries reliable.


No. of Cycles

It turned out that the benefits of changing the battery internal structure for low self discharge also rewarded the battery with longer longevity. Unlike normal rechargeables, low self discharge batteries tend to be rated for a higher number of recharge cycles. My glitters are rated at 1500 recharges while the latest eneloops are rated at 1800 recharges. Even though mine are the older version, they will still last way beyond normal NiMH batteries that are often rated for 500 recharges.


Performance

Wait a minute, there should be a catch in here somewhere. Does it perform worse than normal rechargeables? It turns out that they don't. In fact, they are the most recommended batteries for high powered torchlights.


Price

With such features performing way beyond most batteries in the market, one would expect that these eneloops to be rather expensive, but surprise! They are not. In Singapore, 1 AA or AAA goes about $5 to $6, which is about the same price as other brands.


I normally don't go for consumables that come in a pretty package because that is like buying a more expensive a nice printer cartridge not for increased ink capacity, but rather for its looks. But for well designed products like these, I'm going to make an exception. I may just get more of it to complete the collection. Heh.


Thursday, June 06, 2013

My new 2xAA Batteries Emergency Charger for iPhone 4 / 4S/iPod - Black from dealextreme!

Hey everyone! I've finally received my new iphone portable charger from dealextreme. Its SKU67065 from dealextreme.com. I bought it for US$5.30, which is a reasonable price considering that most brand-less li-polymer mobile chargers go for about SGD$10.

I bought this because my dad's old hand-me-down li-polymer based portable charger isn't really working out for long trips away from the power socket. Sure, it does help to ensure I'll survive the rest of my day but that would mean I will have to be conscious about the battery usage.

The biggest difference between this and my old portable mobile charger is that I can always replace fresh batteries to charge my phone so that as long as I have enough batteries with me, I can always keep my phone juiced up all the time. Using rechargeable NiMH batteries to power this little thing provides a guilt free environmentally friendly way to keep a smartphone happy for hours. This is unlike energizer's energizer's aa portable phone charger which was reputed to be only good when used with expensive lithium batteries.


I particularly like the clean design of this portable charger. There are no switches, buttons whatsoever. All you need to do is to insert them batteries and plug it into your phone. Viola! It starts charging instantly. Due to this simplistic design, it is feasible to leave your batteries inside all the time without the circuitry slowly draining the battery away (refer to parasitic drain below). 

The finishing of this charger is also quite high quality. The plastic is tough and durable. Something that I expect to last quite some time.

 
Simply slide to unlock.


I used lithium batteries and it worked too.

The size and design complements the clean iphone look and is not at all obstructive when I used the phone when charging.

The bottom part of the charger follows the contours of the iphone so that it can be rested on a flat surface. This is good as it is unlikely to bend the connectors in the long term.

So far, I tried two different NiMh batteries:

MAHA imedion 2400mAh  - 60% increase (avg).
IKEA 2000mAh NiMH - 50% increase (avg)

Parasitic drain (not plugged in): 0.4mA
[Theoretically, a pair of MAHA imedions would be completely drained after being left inside for 8 months]

The charging data is pretty consistent given the delta in battery capacity and phone charge increase. I am also particularly pleased that this little thing produces very little heat in the process of charging, translating to minimal energy loss.

I would recommend using Low Self Discharge (LSD) NiMH batteries for your charger to give you the assurance that there will still be energy left in the batteries when you really need them. Typical NiMH batteries will lose most of its energy by around 3 weeks while LSD batteries can retain as much as 70% over a year or two.

All in all, an excellent buy with a very reasonable price considering the build quality and efficiency of the circuitry.

Tuesday, May 28, 2013

Is it okay to mix old and new batteries?

Most batteries would come with the same standard advice in full caps DO NOT MIX NEW AND OLD BATTERIES. Now, we all know that mixing new and old batteries will mean that the old battery will be the first to go, dragging down the performance of the entire group of batteries hence, we mixing is a bad idea. But is it really a bad idea all the time?

But wait. Why would you want to mix old batteries with new ones anyway? Chances are, some batteries are "half used" and it is difficult to say which ones should be thrown away. This is especially so for "drained" batteries that were used in digital cameras. These batteries often have enough remaining capacity to serve low powered devices such as remote controls, sensor lights and calculators for a very long time.

If you have a at least cheapo multimeter, you would be able to find out the voltage of the battery. Although this is not exactly a scientific way to tell the remaining capacity of your battery, it at least give a very rough estimate about when you should actually throw the battery away.

A typical AA/AAA battery should read 1.5V without load. Without load means the battery is not being used at the moment. Normally, the voltage reading of a battery will sag if it is being used. This is more prominent under more demanding loads.

Ok, if you want to mix batteries, read on. But be reminded that this advice is only applicable to non-rechargeable batteries! Mixing full and near-empty rechargeable batteries will certainly damage the near-empty ones as they go beyond empty.

1st step: Check the voltage under no load!
- Put the voltmeter to read "DC voltage"
- Touch the terminals with the probes.
- Is it between 1-1.5V? If it is, re-use it for less demanding devices!

 Information is key...

Step 2:
- Mix those batteries!

Step 3:
When the device is once again low on power, re-check those batteries and see which ones are low. I found that for a 3-battery device, usually only 1 battery is completely dead and needs replacing. Once that dead battery is replaced, it works well again! By doing this, I saved many batteries while keeping my sensor light bright and nice.

Why oh why manufacturers make devices that uses odd number of batteries?

Disclaimer: Alkaline and carbon zinc batteries may leak after a while, regardless of whether they are empty or not. However, driving them till empty increases the chance of leakage, which is corrosive to metal contacts. Do check your battery powered devices once in a while.

I discourage the use of non-rechargeable batteries because they are extremely low on value since they only work once. Rechargeable batteries are slightly more expensive, lasts at least 500 cycles and the electricity used to recharge them is negligible compared to the price of new non-rechargeable batteries. However, they can be rather cheap when bought it bulk for devices that you don't want to keep on an eye on, such as remote controls. These low powered devices have the capability to operate even at very low voltages. This means that you'll have no clue that the battery is almost dead. Rechargeable batteries should never be brought below too low a voltage as it will damage them.

Saturday, May 04, 2013

NUS attempts conversion of petrol powered motorcycles to electric.

http://usp.nus.edu.sg/whats-new/2013/usp-launch-demo-electric-bike.html

A bunch of USP students managed to convert an old petrol powered bike into electric propulsion.

The main point of this seems to be aimed at extending the life of really old motorcycles with failing engines. Given the small capacity of most motorcycles, these bikes are usually ridden hard in Singapore in order to keep up with the pace of the roads and expressways. Particularly bikes under the 2B category.

The new electric propulsion makes use of seal-lead acid batteries which are typically very heavy while carrying little capacity, takes a hell of a long time to charge and its lifespan will be shortened every time the battery is used near its full capacity. On the flip side, they are relatively cheap to buy and cheap to maintain.

The only problem this project has is that the costs:

"...costs for the average motorcycle rider using the converted electric engine would drop from about S$121.11 to S$29.79 per month"

The estimate of $121.11/month is overly high if they are only considering petrol costs of a typical 200cc motorbike. Although the chassis used in this project is probably one that came with a 400cc engine, I sincerely doubt that the new electric motor has the same performance as a 400cc engine. Hence, it is fairer to compare it with a petrol engine of similar performance, which will be one that is 200cc and below. Unfortunately, the petrol costs for engines this small typically achieves very high fuel efficiency of about 30-40km/l, which means that it will cost about $70 per month if it is used for 38.5km per day. This means a saving of only $40 per month with the additional inconvenience of range anxiety, inability to follow the pace of other vehicles on the road and the initial conversion price of $3500 is already enough to buy a used bike with about 3-5years COE left.

In terms of overall running costs, an electric bike will save on maintenance fees that a petrol powered bike has to go through every 3 months, however, it is important to note that when the batteries are at its end of life, the replacement will cost quite a bit. In the end, it is difficult to tell which one will cost more in the long run.

While this project demonstrates the feasibility of converting the an old petrol bike into an electric one, the economic feasibility of this endeavor is not good because of the other costs of owning such a motorbike in the first place. This includes insurance, the need to renew the COE of the old bike and road taxes. All these additional fees make it hard for anyone to consider having an electric bike especially when the owner gets charged the same disincentives as one who owns a traditional motorcycle.

Sunday, March 10, 2013

Solar power now: The Ikea Sunnan lamp

Yes, I've been a bit of an Ikea fan recently. It is kinda nice to be immersed in new furniture, decorative stuff and lights from Ikea because there is such a huge variety! Makes me wanna buy a house and fill it with interesting and functional products and furniture. I think the thing that makes me want to visit Ikea time and time again is because their products range caters to those with deep pockets to customers who are struggling with the high cost of living in Singapore. Naturally, the cheaper products are not always very well high quality, but they can be rather cheap. Some of the time, the cheapness really comes from how the product is designed and packaged. One example was a table lamp I saw which was on sale for $5.90. What the hell, it is cheaper than a Big Mac meal! Oh my oh my, it was tough to resist picking up every little interesting product I saw.

I wanted a small directional lamp for my table so that I can light up my table. My ceiling lights are really bright and it is kind of wasteful to light up my entire room when I'm only at my table. So, I looked at several of their flexible-neck lamps that uses LEDs. Damn, it turned out that most of them produces a far amount of heat. I suspect that the entire step-down transformer is housed in the head of the lamp since LEDs do not produce much heat. Moreover it was quite a let down since they were not as bright as my torchlight it was producing more heat than my torchlight!


So, I came across this small work lamp that uses a solar and rechargeable batteries, the Sunnan lamp. It too has a flexi-neck. Most of the time, solar based products are rubbish - the entire product becomes useless when the rechargable batteries die. Not this one though. The design allows you to swap dying batteries.

Whats more, the designers figured that it would be strange to put the entire lamp in the sun to charge, so they made a removable module with the solar panel and batteries in it so that it can be sufficiently charged in the sun.  The only problem is that the batteries will get pretty warm when left under the sun. This will potentially shorten the lifespan of the batteries. Currently, I'm thinking lengthening the wires to the solar panel so that I can place it outside my window permanently to let it charge my batteries rather than having to remove the module every time.

The lamp is rated at 20,000hours so I probably won't ever have to change it. Even if I do, it is to upgrade it to a newer, more efficient bulb in the future. The batteries however, will probably need to be changed every 1.5years. I'm not sure how long the solar panel will last though.The circuity is also very simple, if anything fails, it is possible to run to sim lim tower to get a replacement.

I don't think it can replace a normal lamp if you are intending to use it to light up a table for writing an essay. But increasingly, we are using solely using laptops for work and play and this lamp is sufficient for lighting up the keyboard and for doing simple stuff. I can imagine using this for lighting up outdoor tasks such as BBQing.

Edit:


I tried charging the battery pack a few times and it worked splendidly. The solar panels may take quite a while to charge up the battery but it does get the job done. Simplicity is good.

The solar module opened up to reveal the outdated BYD brand 3x 1200mAh NiMh batteries. I really doubt the batteries can take the abuse from being heated up under the sun. The really simple circuit board holds a diode and a fuse. I'm not sure if a fuse is so necessary but it will probably prevent a short circuit should a careless person touch both leads together. The diode is to prevent blackflow of current into the solar panel. Thoughful and simple.

When it comes to electrical components, the less there are, the more efficient the entire product is. The lean circuitry of this lamp does without many other components that it can live without. Thing such as:

1) a voltage regulator to maintain the brightness of the lamp throughout the entire battery capacity.

2) Overcharge protection to prevent stuffing too much sun energy into the batteries. After all, the battery module is likely to be unattended when left outside to the sun.

What I would recommend is to check the individual voltages of the batteries once in a while for uneven charging. If any uneven voltage is spotted, charge them up on a charger that charges each cell individually (most chargers do that already). This will minimize the chance of over draining a single cell and damaging it in the process.