Thursday, July 26, 2018

Nikon's 1995 Zoom 200AF Compact Camera (what is it like in the year 2018?)

I recently shot a roll of Kodak ColourPlus 200 with the Nikon Zoom 200AF compact camera. This is my 2nd blog post about film cameras and since I am not paid to review cameras nor do I have the habit of collecting cameras, this one is also dug out from from my family's old camera collection.

This camera, in fact, my wife's and this was what she used during her teens. Yes, we are the generation that transited from film to digital and as much as I missed the nostalgic feeling of film, my wallet never looked back or at least recently after I found cheaper methods to enjoy film.

I choose to use a 'budget' ISO200 film to test this camera because I didn't want to waste a more expensive ISO 400 speed film and I wasn't sure if it is still working and wasn't sure what DX ISO coding the camera can accept. I couldn't find the manual for this, but a similar camera, the Zoom300AF could only do 100, 200, 400 and 1000. So, ISO 200, it is.

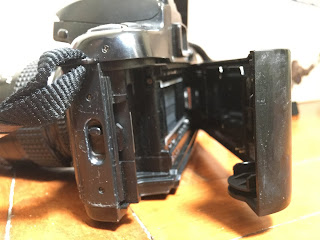
The Nikon Zoom200AF and all it needs to get up and running: CR123 battery and a nice 35mm film

First Look

Build quality wise, the Zoom200AF is a camera is not too heavy but it doesn't feel like a toy. The plastic used here reminds me of the type of plastic used for electrical plugs. Pretty heavy duty stuff, I might say.

How it looks like inside

Design wise, the Nikon Zoom200AF has lots of smooth curves. It was a departure from the older, boxy camera designs and it probably fit the bill and budget of what a family camera should be and it wouldn't be out of place in the hands of an elderly or a teenager.

I liked the way it feels in my hands. The curvy design is ergonomic and helps to place my fingers where they should be. For example, the left hand grip area is made deliberately to separate the flash from my fingers while providing a little grip for supporting the camera. The right hand grip area allows my palm to cup the camera snugly.

Fully extended lens at 70mm focal length

The Zoom200AF, as it implies, has an auto focus 2x zoom lens that starts from a wide 38mm to a short telephoto of 70mm. The focal length is typical of most zoom cameras and is a fairly versatile range. Although I would discourage anyone from using the 70mm end due to the difficulty in achieving steady shot at that focal length.

After My First Film: What I think about it

Being extra cautious to make sure that I got the right conditions and framing before I clicked the shutter button, it took me way longer time that I expected to finish up my first roll of film in this camera. It took me an entire month before it reached the last frame.

Surprisingly, the camera is able to get 37 shots out of a roll of 36 exposure film. What I understand is that film is usually sold with 2 extra frames longer than stated because some cameras need to go through a longer length of film header and only manually winded cameras shoot up to 38 frames in one '36 exposure' canister. It is a nice touch here.
 
To me, this camera is truly a point-and-shoot camera and one should treat it as such when using it. There isn't many manual settings available for you to craft your perfect shot.

Here are the modes to choose from:
Auto
Red eye (auto flash)
Red eye with 10 second self timer (auto flash) 
Flash off
Flash on

The camera is geared towards making sure that the user gets a usable picture no matter the skill level. Out of all the settings, only 1 option allows you to force the flash off. I thought that was kind of sad because it doesn't allow you to take a night shot using long exposure (ok, maybe not that long of an exposure because the camera's longest shutter speed is probably just 1/2s anyway)

The metering is as expected from a good camera manufacturer. The exposure was spot on for all 37 frames of that roll.

Note the Auto-Focus

The grid lines are quite clear inside the viewfinder, it also zooms along to reflect the actual focal length

I want to talk about the auto focus. It is quite good on this camera, and it is possible to get pin sharp pictures when the focus catches the right subject you are pointing at. It does require a substantial area for the auto focus to get it right. For example, if you are taking a picture of two people and you did your pre-focusing pointed at the middle of the two persons, you might end up focusing on the scenery behind them. Point the camera at one of the persons to get the focus right.

Flash, Slow sync only

Next up is the flash. I used to think that too much flash can ruin a photo. Not with this camera. This has a diffuser built in. Normally, you can see the horizontal flash bulb inside the flash module but it is so heavily diffused that can't see the flash bulb itself.


Now, because of this heavy diffusion, the flash is distributed evenly across a short, very short distance. I once shot a close-up from about a meter away without forcing the flash off. The camera instinctively fired the flash and I was pleasantly surprised by how well exposed and well-spread the light was. Leaving the flash on is a good thing for this camera. On the other hand, I wouldn't go beyond 2 meters when taking a group photo. Any further and the flash looks disappointing.


When this camera flashes, it seems that it still attempts to capture background light. Maybe there is some slow sync involved here but I'm not sure. For dimly lit locations, it means that your subjects' faces can still be slightly blur due to handshake despite the flash. It would be nicer if I could have normal sync speed instead of slow sync all the time.

Lens Quality


The pictures I have taken were a mix of landscape and close-up portraits. The lens quality isn't the best. There is distortion near the sides. Maybe it is one of the drawbacks of having a mid quality zoom lens. I tend to follow the rule of thirds and frame my subject skewed to one side. This annoyed be quite a bit.


Having said that, the lens work great under harsh lighting. I took this picture at the Singapore River during evening time. The reflection of the evening sun was blinding. I was squinting my eyes as I stood there to take the shot. Nevertheless, the lens handled the harsh light without any lens flares, which is great!

I attempted some shots in search of some bokeh from this lens, but I was disappointed. The blurriness from out-of-focus areas look as though its from camera shake or movement. It isn't creamy at all.

Longevity


Out of all the cameras in my household, this one was strangely built around ribbon cables. Ribbon cables are awesome for keeping the profile of a device as flat as possible, but they don't last so long when they are made to go around moving parts. After a while, the plastic ribbon will break after being bent enough times. The date/time imprint stopped working due to this reason.


Sadly, the terminal at the battery door is also connected via ribbon cable and already there is a crease at the corner where the ribbon cable bends. It won't be long before it breaks off completely and killing the camera completely.


Will I use it again?

I think I might load up another film inside this camera in time to come. It is a simple camera and the design and its features are geared towards just that. I definitely won't take this camera too seriously or expect it to rise up to special situations that require manual control. However, I will take this camera out for informal photography. In my next roll, I'll probably use the flash more often when taking indoor pictures and be mindful of its effective range. For outdoor shoots, it works great.

If you have one of these old camera, do let me know what you think about them and how you use them. I would be happy to hear from you.


Friday, July 13, 2018

What type of non-rechargable battery should you be using? Carbon Zinc, Alkaline or Lithium

Clearly, our choice of battery is largely limited by whatever size that fits into the device we are trying to power up. Most of the time, there is only one type of battery chemistry available for a specific size. For the typical CR2032 coin battery, there is no other battery type other than Lithium. But, when it comes to the more common AA & AAA sizes there are usually 3 types - Carbon Zinc, Alkaline and Lithium available.

In this entry, I will be focusing only on primary, or non-rechargeable types. I will be following up to talk about rechargeable batteries in the near future. Despite in the leaps in improvement and reduction in cost of rechargeable battery chemistries, I believe that there is still a place for non-rechargable batteries in this time for the reasons of cost, capacity and dependability.

Here, I will discuss the situations and devices that will be best suited for the these 3 common battery chemistries - Carbon Zinc, Alkaline and Lithium.

Powering up many (really low drain) devices at Low Cost - Carbon Zinc
For devices that require intermittent usage across many many months

Really cheap stuff. Its ironic that the 'heavy duty' marketing speak is used here. It might have been worthy of heavy duty tasks during its hay days but time isn't too kind on old technology. Expectations have changed.

Sure, rechargeables cost next to nothing to run after the initial cost of buying the batteries and a good charger to go along. The price of electricity to charge them up during their entire lifespan is negligible compared to buying new cells all the time. But there are times when we need a lot of batteries for several low power items such as remote controllers. My home has at least 6 controllers for my TV, sound system, and other appliances. These controllers sip very little energy and can last for several years on a pair of AAAs or AAs.

Carbon Zinc types (those that are sold as 'General Purpose', 'Heavy Duty' and 'Extra Heavy Duty') are very economical. SG$1 can get a pack of 8 AA or AAA. They have the lowest capacity compared to the other two options but they can still last a good amount of time if used in low drain devices such as clocks, remotes and small toys.

High Capacity (at low drain) - Alkaline
For devices that gobble up batteries in several days to weeks

I re-purposed these Geonaute alkaline batteries from a headlamp I bought from Decathlon. The headlamp was starting to lose its brightness and the batteries were probably half depleted when I re-purposed them. They can still last a really long time in a low drain device like this remote controller

The reason why all battery manufacturers do not state the capacity of non-rechargeable battery is because the capacity of non-rechargeable batteries greatly depend on the rate of power use. Typically, the higher the power needed, the less capacity the battery is able to deliver.

There is a short period of time when some digital cameras used AA sized batteries and rechargeable batteries were still not really there yet. People brought loads of Alkaline batteries to power up their cameras on holiday. These cameras, with their energy guzzling LCD screens, tend to last about an hour of continuous usage on a set of 4 AA batteries. It was expensive to sustain a digital camera and these were pushing the limit of Alkaline batteries.

According to Energizer's datasheet, a AA battery can provide up to 3000mAh of energy if it was used in a device that required a constant current of 25mA. Its capacity can drop to half of that if used at 1500mA. Practically speaking, many portable devices drain at a rate between 25mA to 500mA. For a general idea of how long a AA battery can last at these rates:

At 25mA the battery will last 120 hours,
At 500mA, only 3 hours.

Available Capacity vs Discharge Rate (at 500mA, half of the total capacity is converted to heat before  Source: Energizer E91 Alkaline AA Datasheet

Naturally, I try to use alkaline batteries in sensor lights, slow motorised toys and stove igniters. In general, I put them in low-medium drain items that does not require frequent re-loading of batteries.

Dependability - Lithium
When you really need it to work in a very expected and reliable manner (compared to other non-rechargeables)

Image source: Energizer


Lithium non-rechargeables are the most expensive battery type and they cost just a hair less than its equivalent NiMh sizes and in recent years, Lithium-ion of similar capacity have also gotten quite competitive in price.

A pack of 4 AAs cost a whopping SG$17.80 at NTUC Fairprice, a local supermarket in Singapore. A few dollars more and you can buy a nice pack of NiMH rechargeables.

Nevertheless, for its weight and size, it packs a lot of energy. A single Lithium AA battery holds about 3500mAh but unlike the cheaper Alkalines, its capacity is less dependent on the rate of discharge. This means that it is possible to make full use of its capacity even at high discharge rates of 1000mA (Source: Energizer L91 datasheet).

For comparison, for a device that draws a constant 1000mA,
Lithium AA: 3.5h
Alkaline AA: 1h

Lithium tends to hold up well in high discharge situations, unlike alkalines. Source: Energizer L91 Lithium Datasheet

I haven't bought AA/AAA sized Lithium battery in years. I find that almost everything I need from non-rechargeable Lithium batteries can be met by NiMH rechargeables.

My most recent Lithium battery purchase was a uniquely shaped CR223 battery that my old camera, Nikon F601 uses. Lithium batteries are still widely used by film cameras and there is no non-recharegable equivalent in other chemistries. Some of Fujifilm's instant film cameras use a very small CR2 lithium battery for power. These Lithium batteries are great at giving cameras a consistent performance particularly for flash photography and high frame rate shooting.

A common photo battery is the CR123. Shown inside my compact film camera

I'm happy that most battery manufacturers still churn out odd sized batteries that keeps my old cameras alive. Had my old cameras used some proprietary rechargeable battery, it would be extremely difficult get my hands on them.

Friday, June 08, 2018

Is the 1991 Nikon F601 film SLR camera relevant in 2018?


It's been a while since I held a digital single lens reflex camera in my hands, much less a film SLR camera. My dad had an old Nikon F601 tucked away in the wardrobe. Its big, cumbersome and heavy. But it does feel comfortable and solid in my hands. Today, this camera is 27 years old and has a kit lens of 28-70mm (f/3.5-f/4.5) that is still considered a versatile range for most scenarios.

When I unzipped the camera from its awkwardly shaped camera case, I realised that the switch was left in the 'on' position and I was probably the last person to fiddle with it during my Junior Collage days which was more than 10 years ago. It goes without saying that the battery was drained of every ounce of energy and was completely dead.

Battery

Thankfully, it was a lithium battery and unlike alkaline or carbon zinc batteries, lithium batteries don't leak no matter how drained they are. Yes, it was a non-rechargeable lithium battery. The battery size is an odd CR-P2 or 223. The reason for its odd shape wasn't because of any special battery making technique but because it was actually made up of two less uncommon CR123A cells soldered together to give 6V. Lucky for me, the CR-P2 battery is still in production, albeit expensive at a whopping SG$14 a piece.
Thankfully for taobao, I got a random branded CR-P2 for SGD4.5. At this price, it was cheaper than what I remembered 10 years ago! I won't expect too much capacity out of this battery but at least it does have a respectable voltage.

Film

35mm film in Singapore is ridiculously expensive (a basic Fujifilm c200 colour film cost $8.90 and that was exclusive of processing. The same film from taobao is a nostalgia inducing SG$3.5 - exactly the same price as I remembered it to be if purchased as part of a 3-roll pack ten years ago.

I do hope to shoot more types of film, but maybe I starting off with cheap films like the Fujifilm c200 would be good.

You know that film is pretty much alive in the digital city of Singapore when there is a vibrant  facebook group Let's Shoot Film SG dedicated to film photography. I am glad to find other like-minded film enthusiasts and to know how they enjoy their film.


One of the drawbacks of shooting film is that the cost can add up quickly. Paying to print or scan a roll of film will make up the majority of the expenses for enjoying film photography. Nevertheless, I find it exquisite to shoot in film and the fact that it is expensive makes me want to craft my shot more meticulously before pressing the shutter.

C-41 Processing: $3.50
Processing + Scanning: $10
Processing + 4R prints: $3.50 + (36prints x $0.35) = $16.10

Problems

As with technology, some parts of the camera did not age well.

1) Main LCD panel was completely blank. Simple info like number of pictures taken and the current mode cannot be viewed. Thankfully, some essential info were projected in the viewfinder. Repairing this would bring back most of the camera's usability. But I wonder if it is worth it.


2) Film cover hinge broke. Apparently, this was a common issue with the F601 as the hinge was plastic. Over time, it became brittle and broke. While I could get it fixed, it is a low priority issue as it could be easily sidestepped with some cheap gaffer tape.


3) The last problem was due to the lens, rather than the camera itself. The kit lens' aperture lever no longer springs back to the highest f stop, meaning that it is always on its biggest aperture setting all the time. I recently saw a a youtuber doing a full teardown of a camera lens. I have a sneaky suspicion that a spring is dislodged and probably need not open the lens a great deal in order to fix it myself. Maybe I will do this some time!

So is the Nikon F601 still relevant?

Feature wise, it has all the features that I needed from an SLR camera. Sure, it has a slow continuous shooting rate of 2.5fps, but I doubt I will ever use that for shooting film.

All the manual features are easily accessible via the single jog dial and it is a joy to shoot with it, as expected from an SLR camera.

The most important things are the consumables that the camera requires. Namely, the battery and film. These two can, fortunately, be obtained at a reasonable price even at this day and age.

I think film cameras offer a possibility to go back to a time when things moved slower and encouraged us to slow down and put some thought into the picture want to capture instead of simply shooting directly to social media. The F601 that was hiding in the wardrobe the entire time certainly serves this purpose very well.

Having a lens that is capable of larger apertures compared to point-and-shoots and camera phones does help with creating creamy blurry background otherwise known affectionately by photographers as bokeh. This makes the pictures taken from this old camera far more special and allows me to craft my picture in a more refined manner.

I was  pleasantly surprised to see how the pictures turned out. The meter was spot on and the colours are cool but still quite accurate. I do think that I have to work on my manual focusing and my hand holding techniques for darker scenes. But that is a story for another time.

Sunday, April 29, 2018

5 tips and tricks to Improve your Instax Mini Photography

Hi everyone!

It has been a while since my last post. I have been stuffed with work the past year and haven't been blogging as much as I liked.

I recently got back into photography, particularly instant photography with Fujifilm's Instax Mini format. In this post, I want to share with you 5 tips and tricks that I have picked up along the way that had enhanced my experience of using the instant film, hopefully it will be useful to you as well.


1: Cost of Instax Film
First, the cost of film is expensive. When I first got my Instax Mini 7s, I think I shot about 6 packs of film before I decided that it was too expensive to continue shooting with this camera.

I really liked using the 7s. It is a fun camera but my wallet didn’t agree with it. In Singapore, it costs SG$13.90 for a pack of 10 photos at Harvey Norman and its quite an indulgence, man. Thankfully, globalisation happened and now it is feasible to buy Instax film from all around the world.

The prices on Taobao and Amazon are pretty acceptable if you buy in bulk of about 20 pieces and above. At the time of my purchase in 2018,  it worked out to about SG$7.50 to SG$8 for a pack of film. This is almost half the local price!

If are thinking of experimenting with your photos and don't mind using expired film, you can head over to Carousell try to get some. And of course, don't over pay for these. I paid SG$4.90 for a pack of film that was expired 7 months ago. So far, I haven't found any noticeable difference between expired film and fresh film.

Expired films with fanciful borders on the cheap!

2: Keep your Instax Photos Scratch Free On The Go
The next problem stems from its strength as an instant film. So, you just took a picture, its in your hands, then where do you keep it? These Instax films are fairly easy to scratch and its the only picture you have. How then? Buy Instax albums and bring along? That works too, but Instax albums tend to be fanciful and huge.

Inconspicuous name card holder

Not to mention, anything that gets slapped with the Instax trademark instantly (heh heh) increases in price. Luckily for us, Instax Mini film is exactly the same size as a name card. And no one ever buys name card folders so they tend to be very cheap. I got myself a small one that holds 40 pieces that I keep in my pocket to keep my precious pictures scratch free.

Shh... it is actually my Instax album

3: Sharing your Pictures
Third, people say that sharing is caring but Instax film not cheap. Its really precious! If u have 10 friends you want to share a photo with, it is really not feasible to take the same picture 10 times to have 10 copies. Normally, I would take the picture home, scan it and share on social media. But this takes away a bit of the magic of instant photography especially when you are overseas and u really want to give a picture to the kid from an indigenous tribe 1000s of miles from civilisation.

Photo scan via Google's Photoscan (the quality in this blog is not representative of the actual quality of the scan because it is heavily compressed here)

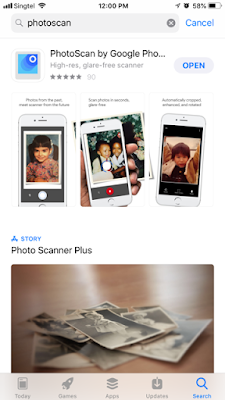
For this issue, I should say that there is an app for that. Introducing google’s Photoscan. Its a clever app that combines several photos to remove the glare from glossy pictures. You first take a full shot of the picture and then position the centre of the camera to the 4 circles of the picture. The app will then sort out the glare and the end result is as good as a proper scan. The quality of the picture is clearer and more vibrant when this is done under bright light. Digitize your pictures before you give the original away!

Google's little known app - Photoscan

4: Exposing Instax Film Correctly
Forth, after trying Instax film for a while, I find that the film is surprisingly unforgiving. Its easy to end up with pictures that are too dark or too bright. When this happens, the Instax film loses a detail when its over or under exposed.


 The only 4 settings available on the camera
 
So, it is really important to make sure that the scene that you are capturing does not have too much variation in brightness. If you can't help taking pictures under such conditions, you need to match the aperture to the brightness of your subject instead of the general brightness of the scene. This way, your subject be properly exposed. This is way harder than it sounds and takes a lot of practice to guess the correct setting to use.


Top view of my Instax Mini 7s with the aperture adjustment knob on the right

Also, if you are taking pictures of people, try to position them side by side instead of front and back. This is to make sure that the camera’s flash lights up everybody's faces evenly. Otherwise, the people nearer to the camera will be too bright, the middle will be ok but the furthest faces will be too dark.


5: Adjust your Flash Output
My fifth tip is regarding taking close ups. My Instax 7s camera has a minimum focus distance of 0.6m. But the flash is far too bright that distance when using the indoor setting. Owners of the Instax 7s would know that there is no way to control the power of the flash nor switch it off.

 
A little piece of plastic over the flash to soften the flash 

One way to 'adjust' the output of the flash is to tape a small piece of white paper or translucent plastic onto the flash to diffuse the light. I taped only the top part of the plastic sheet so that I can flip it away from the flash whenever I need full power and I do not have to remove the plastic sheet completely. You might have to experiment with different thickness of plastic to get the desired effect.

 
 Full power mode!

It is also possible to reduce the effective range of the flash by choosing a smaller aperture setting but this would mean that the background will become very dark. I do this sometimes to isolate my subjects so that they stand out in the picture.

Final Thoughts

That's all the tips I have gathered so far. I think the Instax film is a challenging film to work with but if you do get it right, this film rewards you with beautiful colours and I hope you will come to enjoy instant photography as I have.

Let me know what you think about instant photography and if you have some Instax related tips and tricks up your sleeves, do share them in the comments below. Thank you for reading!


Sunday, November 05, 2017

Things to know if you are heading to Camp Growl (Ex Wallaby) 2017 Update

Two years ago, I wrote about 5 essential things to bring when heading to Ex Wallaby. Going overseas for an exercise can be very daunting especially if it is your first time and it is so far away from home! So, I hope the information I provide can help you ease your anxieties and make your life a bit easier during your admin time in Camp Growl.

Much has changed since I last wrote my last blog post about this and it is time to update it to the freshest information. Obviously, I cannot write too detailed about what goes on in camp. But at least, here are some publicly known information that deserves to be consolidated in one spot so that it is convenient for you when you are already rushing for time, packing and running multiple trips to e-mart and army market to check off your packing list. If you have more information to share, do let me know in the comments!

1. Mobile Phone & Communication

Good news! I'm happy to update that there is now good 4G signal at Camp Growl and you can now communicate with your loved ones as often as you like (during your admin time, of course).

Buying your Australian Pre-Paid SIM card

The first step to establishing contact with the outside world is to buy your SIM card! But don't rush to buy one from retail stalls at the airport. These won't work unless you activate it using a passport number tied to an Australian Visa or Australian Drivers' License. Instead, buy them from Camp Growl. Go ask your superiors when the Telstra representative would be coming down to the camp to sell the pre-paid SIM cards. The rep will likely be selling at the canteen. There are no signs, no booth - just an individual with a stack of pre-paid SIM card packages.

There is only 1 option - a $30 Pre-Paid Starter Kit with 7.5GB data allowance and $5 of credit for calls and SMSes.

I had to wait for about half a day before the SIM card is activated and finally felt my phone vibrate from the messages that were coming in. It felt so good to be connected again.

*Unfortunately, Optus' signal is almost non-existent in the camp. Until Optus manages to do something about this, stick with Telstra.

Reduce your data usage!


By the end of my first day of getting the SIM card, I was shocked that I had used more than 0.5GB of data. All I did were the same things I used to do when I was at home - scrolling through Facebook, browsing Instagram, a light YouTube session and reading websites.

I turned on Data Saver Mode on Facebook, Instagram as well as disabling HD video for YouTube. These helped a lot. But was still burning through a few hundred megabytes daily.

I really appreciate how much data that my home Wi-Fi was transferring every time I was at home. 7.5GB is really not much.

If you are a compulsive data hungry person, you will be calmed by the possibility to 'recharge' the data allowance via credit card. But that means you will need your primary SIM card to be online to receive your one time password.

2. Power

Now that the camp has mobile connectivity, the next thing that we need is power. Yes, we are still not allowed to charge in our tent and have to head to the charging tent as our source of power.

It is at the charging tent where I felt that the charging speed is way too slow and time consuming to be sitting there waiting for my phone and powerbank to charge up. This is despite the fact that I had already brought along a pair of QuickCharge 2.0 compatible charger and a Xiaomi power 10000mAh powerbank. This meant the charging speed is capable of going twice as fast the usual charging speed.

Both the charger and powerbank must be QuickCharge compatible to get the most out of the fast charging.

I highly recommend getting the Xiaomi 10000mah version 2 powerbank as it is one of the cheaper powerbanks that offer QuickCharge. The slim form factor is easy to carry around and while the charging is still long ( I didn't time it but it felt long), the charging progress is noticeably faster when compared to another person's powerbank without QuickCharge.

3. Local Information

After almost 3 weeks of being inside an army controlled area, you might be lucky enough to have a day of R&R at Rockhampton town. After all, it doesn't feel right going to foreign soil and not be a tourist for some days. Here are some information that you should know that would make you a guru in the area

Daylight Savings Time
- Rockhampton does not practice daylight savings time. Your phone might mistakenly advance the time thinking that you are in some other part of Australia. Take note of that.

Getting Around
- Getting around Rockhampton town is easy. Call a cab at 131-008, tell them your pickup point, destination and number of passengers. It costs about $12-$20 getting to and fro most places in town. Just pay the metered fare, no tip required.

Business Hours
- Shops start closing at 4pm onwards, buy your necessities early in the day, leaving the rest of the day for sight seeing and souvenir shopping.

Sunday, July 30, 2017

DIY Button Repair for Car Key Fob (or remote controller)

Hi everyone! It has been some time since I've written something here. I have been experimenting and trying out making youtube videos to better show how I do my DIY tasks and repair.

The video below is a simple video I made to document how I repair the unlock button on my car's key fob. The button was wearing out and frankly, it is the only thing that can and will wear out on a key fob. My car is now 11 years old and the key fob button can only withstand so many presses throughout its life.

But that doesn't mean that it should be thrown away just yet. The integrated circuit and other miniature components have no moving parts nor do they produce heat. Electronics that run cool and take electrical power directly from a battery tend to last a long time because nothing much could go wrong.

So, lets extend the key fob's lifespan by swapping out the worn out button for a new one! I hope this video is helpful and do give me your comments on how I can improve. Thank you for watching!


Friday, July 21, 2017

The one regular servicing that you must do for your car

I have been studying at Automotive Technology at ITE College West for 1.5 years now. I have always been wanting to study about cars ever since I was young and can only afford study it as a part time course since I have entered the inevitable workforce.

Several of my classmates who are full time mechanics recounted similar stories of customers towing their car to their workshop for a costly engine rebuild due to a lack of maintenance. Some of those cars were less than 5 years old. That is rather unfortunate because an engine rebuild is rarely required for most cars throughout its entire lifespan. Unlike most everyday items we own that does not need any tinkering when its working fine, a car requires regular servicing to upkeep some of its "perishables".

Some car owners may be unaware that servicing has to be done even though the car is working completely fine. These are the same people who only feel the need to bring their car for a servicing only when they start to feel something strange with their car. By then, the damage might already been done. Leading up to costly and lengthy repairs.

If you own a car, the bare minimum you have change is its:
2) Engine oil 
2) Oil filter
3) Intake air filter

But how often do you have to change them? The answer to this question lies within the owners' manual within your glove compartment. Typically, the recommended engine oil change interval is 10,000km or 6 months (whichever is earlier) and this forms the interval to change out the other maintenance items such as the oil filter and intake air filter.

You may ask, what about other parts of the car? Most other parts require maintenance or replacement every once in a long time or when it starts to wear out. Sending your car to the workshop regularly will allow the mechanics to inspect and recommend additional maintenance for your car so as to catch any potential problems before you end up stranded on the road shoulder.